Hula Hoop Dance is a dynamically evolving genre, adaptable to any style of music, approachable for the solo dancer, duet or ensemble, and accessible to all generations and body types. Some styles of hula hoop dance keep the hoop rotating on the core body, as the dancer focuses on footwork and the movement of the arms around the hoop. Other styles keep the hula hoop off of the body the entire time, manipulating any number of hula hoops to move in the space surrounding the dancer. Still, other styles move the hula hoop between planes, core hooping, and off body hooping. Sometimes the hula hoop rotates around a body part, rolls along a path, or doesn’t rotate at all.
If you are just entering into the world of hoop dance, there are two pieces you need to focus on:
• Exploring the movement of your own body and
• Learning to communicate with your hula hoop.
After working with these fundamental skill sets, your own personal hoop dance will begin to morph into a style that feels right to you. Please note that I could spend an entire weekend nerding out and elaborating on the building blocks of hoop dance, but in the context of this moment, I hope to give you the first stepping stones to welcome you onto your own personal path of discovery.
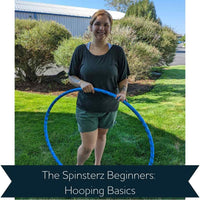
Step One: On Body Hula Hooping aka “Body Rocking Hoop Dance”
Each of the following On Body Hula Hooping topics will begin by explaining the foundational movements. While each of these building blocks is described for the absolute beginner, it can be helpful for even the experience hula hooper to revisit these fundamentals. Even if dancing with the hoop of your body is your goal, these “Body Rocking” exercises will help you open up ways to move your body in dance that can be applied to off body hooping later on.
Each topic will end with exercises to convert the foundational movement into dance.
Waist Hooping Foot Work
Whether you are picking up your hula hoop for the first time or have already been loving on your hula hoop for a year, take it back to that first push of the hula hoop around your waist. Note that the diameter of the hula hoop will determine the speed your body has to move. For more information on how to pick your hula hoop, take a moment to review “What hula hoop size do I need.”
Place the hula hoop on the small of your back. If you lean a little into a back arch you will feel that spot that your body starts to hug the hula hoop. Take one step forward so you have one foot in front of the other. It doesn’t matter which foot you use, just pick the one that feels most natural to start. Keeping the hula hoop parallel to the ground, give it a strong push with your hand in toward your tummy so that the hula hoop can rotate around your body a few times without you even having to move your body. Learning the control of this first push can make or break the ease of your hula hoop practice. Try this same thing with the other foot in front or while pushing with the other arm and get used to both sides.
Once the hula hoop is spinning around your waist, move your body in a straight line so that your belly button is drawing a line between your toes. Keep your heels on the ground and your knees soft as your body finds the tempo of your hula hoop.
Keeping the idea of your belly button moving in a direct line between your toes, try these three-foot positions:
1. Right foot forward – Body moves front to back
2. Left foot forward – Body moves front to back
3. Feet side by side (2 feet apart) – Body moves side to side
In each of those positions practice pushing the hoop in either direction so that you can do each foot position with the hoop spinning right or left. Then try changing foot positions without letting the hula hoop drop.
The Dance
Start by putting on your favorite song. Practice changing your foot positions so that you are placing your foot into the next position with key moments of the song like the beginning of a new line or a strong beat. As you get further into the song, try changing the foot position more often or repeating patterns of movements. As you gain confidence, experiment with other foot movements like a grapevine, a box step or a cha-cha. Put on different styles of music and see how the style of music changes how you want to move your feet.
This is a core foundation of Hula Hoop Dance footwork. The more you play with this concept the more comfortable your body will become, separating the movement of your hips from the movement of your feet. You will find that while your feet will change speeds with the steps and the music, the rotation of your hula hoop will stay consistent. It is natural to feel frustrated at first, so it can help to try a hula hoop with a larger diameter than you would usually use when trying new footwork.
Turning Your Body
Turning or spinning your body while hula hooping has many purposes.
1. Adds a contrasting movement and allows you to face in any direction
2. Changes the speed of the hula hoop in relation to your body
3. Can make learning new tricks and movements easier
4. Assists in catching a hula hoop that is starting to fall
5. Disguise or smooth out transitions into other parts of a dance
Turning the same direction that the hula hoop is spinning will make the hula hoop’s rotation feel slower in relation to your body. Turning the opposite direction will increase the speed of the hula hoop in relation to your body so that you will have to move faster as well. For the purposes of beginner hoop dance, we can focus on turning the body in the same direction that the hula hoop is spinning.
A compass turn is a solid building block and starting place for beginners. Pick an anchor foot based on which way the hula hoop is spinning. If the hula hoop is spinning to your left, make your left foot the anchor. If the hula hoop is spinning to your right, have your right foot be the anchor. Place your feet side to side and find a comfortable stance to hula hoop with your hips moving side to side. While your anchor foot pivots in place, use your other foot to push your body in a small 45-90 degree turn. Once you place your foot back down, take a moment to make sure your waist still has control of the hula hoop before making your next turn.
A float turn uses a similar concept as the compass but turns your body a full 360 degrees and turns your body the same speed as the hula hoop for one rotation. This gives the illusion that the hula hoop is floating during your spin. Start with your anchor foot in a forward position and push off with your other foot, using enough force to spin yourself in a full circle. When you complete the spin place your lifted foot back down and continue waist hooping. Be sure to spin your body the same direction that the hula hoop is spinning and to restart your waist hooping movement as soon as your foot hits the ground. Remember to practice these turns in both directions!
The Dance
The use of an anchor foot helps keep a dancer grounded when learning how to turn, but finding freedom from the ground will help release the body into the flow of dance. Start practicing free form turns by moving one foot at a time, remembering from the waist hooping exercises that where ever your feet land, you can regain control of the hoop by thinking about moving your core with the line between your feet.
Put on some music and incorporate your turns into your foot work practice. Since turning with the hula hoop changes the speed of the hoop in relation to your body, you can use your turns to fit your steps and your movements closer to the speed and feel of the music. Try adding a float turn to accent a moment of the music or switch between facing a single direction and slow turns to reflect the lyrics.
Where Do the Hands Go?!
One of the most common thing's arms will do when learning how to hula hoop is to imitate a t-rex. These t-rex arms or chicken wings do well for keeping our arms out of the way of the hula hoop, but will not be your first choice when dancing with the hula hoop. The first way to approach hand and arm movements is to start paying attention to where they are and let them do anything other than the t-rex. Think of it as a three-part process with your shoulders, your hands, and your arms dancing between them.
Start by relaxing and positioning your shoulders. Roll your shoulders forward, up, back, and down a few times, and end with the back and down, an exhale, and imagine your shoulder blades melting down either side of your spine.
Next, think about different places for your hands to be. Extend them out to either side, reach them in front of you, place them behind your head, or hold them on your heart. Your hands could be mirrors of each or each could be doing a separate thing. Experiment with the direction of the palms and the position of your fingers as if each of your hands are their own unique and relaxed sculpture.
Finally, bring your focus to your arms. Stretch your arms wide or let the elbows be soft and gently bent. Your arms might create strong lines, or curve into circles. Find different paths for your arms to take as you switch your hands to new positions.
The Dance
So much of the dance happens in the spaces where your arms are moving to a new position. Ground your feet and start your hula hoop in your dominant direction so that your focus can be on your arms while your body keeps the hula hoop moving. Turn on some music and with every line, move one of your arms. You might move your right hand to 4 different positions before moving your left, or you might switch arms each time. Try leading the movement with your hand, your shoulder, or your elbow and let the rest of the arm follow. Different ways of moving your arm will fit different styles of movement. In the beginning, just find the movements that feel good in your body.
As you get used to having your arms and hands dancing in the air above your hoop, start moving your feet again. Turn with your hoop and use your hands to make circles in front of you as they mirror your hoops movement. Then try to use these movements following the hoop to transition between a different arm and hand positions that you liked. Incorporate arm movements into your float turns by starting and ending with your arms wide, and bringing your hands toward your chest during the spin. Just like before, play different styles of music and try to change the movement of your arms to reflect what you hear.
Don’t forget to practice spinning the hula hoop in the other direction, and see how that changes the way your arms want to move!
Step Two: Empty Space and Outer Space
Getting to know the empty space in and around your hoop gives your whole body a new place to dance. At the same time, dancing within this empty space prepares us for other tricks like breaks, paddles, lifts, and other transitions.
Inside Windows aka Inner space
If you look down at the hula hoop spinning around your waist, there is a moving window of space between the circle of the hula hoop and your body. The same thing can be said of a hula hoop rotating around your legs, neck, hands, feet or any other part of your body. The empty space between the hula hoop and your body is the inside window.
To start exploring the space while waist hooping, start by trying to dip either hand into that window and pull it out again without touching the hula hoop. If your hula hoop is spinning to your left, start by dipping your left hand into the window when it appears in front of your body. If you hoop is spinning to your right, use your right hand in front. Once you dip this hand into the hoop, you can follow the window to the back of your body before you pull your hand out of the way. Where the first hand exits the hoop behind the body, the second hand can enter and follow the window back to the front of the body. With this technique, you can utilize the full window of space around your body without ever making contact between your arm and the hula hoop.
The Dance
Remember how spinning the same direction as the hula hoop slowed the hula hoop down in relation to your body? Incorporating turns gives your hands more time to dance in and out of the windows. As you listen to different songs, start dipping your hands into the windows and following the movement of the hula hoop. When bringing your hands back out try to reach out to one of your favorite positions from the previous exercise and resist the urge to sit in the t-rex position. When in doubt, just let your hands and arms follow circular motions in time with the music.
As you play with the windows your body will become more comfortable crossing the line previously held by the hula hoop. You might want to try keeping your arm inside the window and close to your body so that the hula hoop rolls over it for one rotation before bringing it back out. These switches will also help prepare you for shoulder hooping and other transitions.
Outside Windows aka Outer Space
Outer Space refers to all of the space on the other side of the hula hoop from your body. It may seem far away, but at any point when the hoop is in contact with your body, outer space is an inch away. A great way to get used to playing with your outside windows is to try to touch your leg by reaching to the outside of the hula hoop and swinging your arm down and through the window to outer space. This movement is very similar to playing within the inside windows, only now your arm follows the place where the hula hoop is touching your body instead of following the point that is furthest away.
The Dance
Once you have a grasp on where your hands and arms fit into outer space, you can start playing between the inside and outside windows. Explore the space above, below, and within the flow of the hula hoop and imagine your hands making spirals and circles following the direction the hula hoop is moving. Your hands are dancing through the empty space and your body is familiarizing itself with the movement and every changing location of the hula hoop around you.
Step Three: Style
Like every form of communication, the more you practice your dialogue with your hula hoop the smoother and more natural it will become. The same goes for the movement of your body. At this point do not be worried about if your movements are beautiful or if your transitions are graceful. Regardless of what your movements are, the more comfortable you become making them, the more naturally graceful and beautiful they will appear.
As you find favorite styles of music to hula hoop to, take a moment to watch a couple videos of professional dancers performing to that style of music without props. You don’t need to make any attempts to look like those videos, but see what type of inspiration you can draw from their movements. Explore ways of using your feet and your upper body to imitate styles that you like. Then put on some good tunes and let it flow. If the space allows, put on a blindfold or close your eyes. It is in these moments between you and your hula hoop that your own individual style will start to introduce itself to you.
The Next Steps
From these foundations, you can go in any direction depending on what you want to focus on. Here are some ideas for your next stepping stones:
1. For more “Body Rocking” core hoop dance, start learning chest, shoulder, waist and leg hooping
2. Keep the hoop around your waist but start exploring angled hooping and barrel rolls
3. Learn a lift or pizza toss to transition into off body hooping
4. Practice breaks and paddles to change the direction and momentum of the hula hoop
Search for a local instructor, a regional hoop jam, ongoing classes, or traveling workshops to learn from other hula hoopers and join the growing community. Keep an eye out for new tutorials and online classes from The Spinsterz if you are learning from home.
Ready to get hooping? Check out a great hoop for beginners below!